I used to work with just my laptop (no peripherals like keyboard or mouse) and my shoulders and upper back would get tense after work every day. My dad used to work like that as well and mentioned he got rounded shoulders after 30 years of doing so.
So I got my first ergonomic keyboard. To relieve shoulder and back pain and to prevent rounded shoulders, I specifically got a split keyboard where each part would sit in front of my each arm. I got something simple that was black and looked bulky, but it served me well while I had it.
But my girlfriend thought I could use an upgrade. Something that looked and felt better.
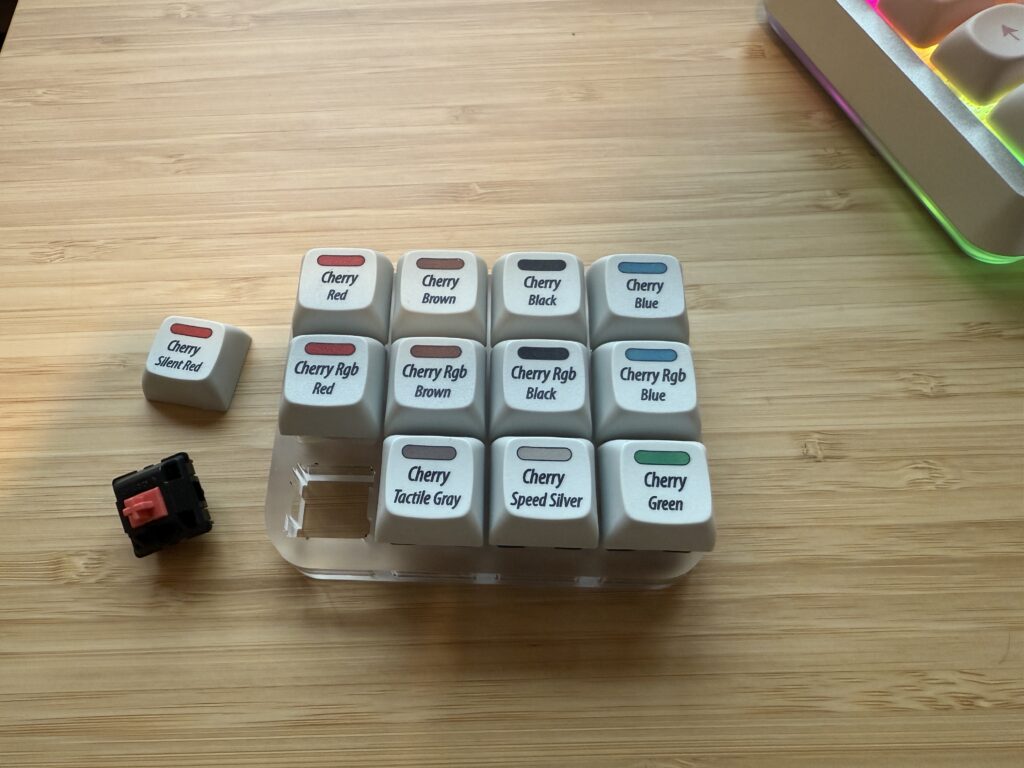
So first, she bought a keyboard sampler. It was like a mini keyboard with 12 keys and each key had different color-based names and different haptic feedback. And I got to learn a lot about different options for custom keyboards.

Keys on keyboards have two parts: switches and keycaps. Keycaps are the covers and the top parts which your fingers touch and press. Switches are below keycaps, provide haptic feedback if any, and let the circuit board know whether the keys have been pressed. On keycaps, you’d pick based on the look, mounting style, material, profile (height, shape, type feel), print method, etc. On switches, you’d pick based on actuation, bottom out, profile/types, noise level, and so on.
Actuation is how hard you need to press a key to have it register as a press. Bottom out is how hard you need to press a key to hit the bottom of a switch. Both use the unit of grams-force (g) where the greater the number the harder you have to press it.
And then there are two main types or profiles for switches: linear and tactile.Linear means the feel of pressing a key is same from start to end. Tactile means there is a little bump in the middle of pressing a key as a feedback to see whether your key press is registered or not. If you feel the bump and stop, the key is not registered which is helpful to prevent accidental presses; if you push through that bump then the key press is registered and sent to the computer.
Cherry MX makes a semi standard for switches using various colors. Their descriptions go from clicky to noticeable to focused to smooth to silent.
When I tried the keyboard sampler, right away I knew I didn’t like blue because it felt too clicky for me and also didn’t like silent red because it gave me no feedback like I was pressing something hollow. But it was pretty hard to decide among all others. I took days to decide my first switches by comparing two keys at a time.
Eventually, I decided that I liked brown the most! And then I was a step closer to getting my own custom keyboard.
p.s. I didn’t spend much time on deciding keycaps. I just found something cute online and bought it.
| Clicky | Robust | Noticeable | Focused | Fast | Powerful | Direct | Smooth | Silent | |
| Blue | V | V | |||||||
| Green | V | V | V | ||||||
| Grey | V | V | V | ||||||
| Brown | V | V | |||||||
| Clear | V | V | V | ||||||
| Black | V | V | |||||||
| Silent Black | V | V | |||||||
| Red | V | V | |||||||
| Silent Red | V | V |
| Actuation Force | Actuation Travel | Type/Profile | |
| Blue | 50 cN (medium) | 4 mm | tactile & clicky |
| Green | 70 cN (very high) | 4 mm | tactile & clicky |
| Grey | 70 cN (very high) | 4 mm | tactile |
| Brown | 45 cN (medium) | 4 mm | tactile |
| Clear | 55 cN (medium) | 4 mm | tactile |
| Black | 60 cN (high) | 4 mm | linear |
| Silent Black | 45 cN (medium) | 3.7 mm | linear |
| Red | 45 cN (medium) | 4 mm | linear |
| Silent Red | 45 cN (medium) | 3.7 mm | linear |
Sources for tables: https://www.cherry.de