Part 2: https://harulee.org/2026/07/15/custom-keyboard-part-2-setup/
The Lulu keyboard that my girlfriend picked for me is a 60% keyboard. She picked a keyboard smaller than a full size so it doesn’t look too bulky. 60% keyboard (also known as K60) has about 60% of the keys that a full-size (or 100%) keyboard has (which has 104 keys). My keyboard has 58 keys so technically it’s closer to K55 (57 keys) than K60 (62 keys), but 60% seems more common than 55%. K60 commonly lacks the number pad, arrow keys and function keys, and K50-55 are typically split keyboards for ergonomic reasons.
Below table is a comparison among my Lulu keyboard, my 16 inch MacBook Pro keyboard, and a full-size keyboard. I’m considering Mac’s Command to be equivalent to Windows’ Window key.
| My 60% keyboard | Mac’s 75% keyboard | Full size 100% keyboard | |
| 58 keys | 77 keys | 104 keys | |
| Number pad numbers (0-9) | – | – | YES |
| Num lock | – | – | YES |
| Number pad Enter | – | – | YES |
| Number pad arithmetic +-/* | – | – | YES |
| Navigation keys (Insert, Delete, Home, End, Page Up, Page Down) | – | – | YES |
| System/Legacy keys (Print Screen, Scroll Lock, Pause) | – | – | YES |
| Right-side CTRL/control | – | – | YES |
| Menu (mouse right click) | – | – | YES |
| Function keys (F1-F12) | – | YES | YES |
| Fn key | – | YES | YES |
| Caps Lock | – | YES | YES |
| Backslash key \ | – | YES | YES |
| Right-side Option/Alt | – | YES | YES |
| Arrow keys (up, down, left, right) | – | YES | YES |
| LOWER modifier key | YES | – | – |
As it is very different from a typical full size or 75% keyboard, my new custom keyboard presents multiple challenges to getting used to. First, it is missing dozens of keys as shown above. Second, some keys are in odd places in order to compensate for the limited space. And third, its layout itself is also a bit different and a bit odd.
This smaller keyboard gives access to the full set of keys via additional modifier keys LOWER and RAISE in a layer-based system. Modifier keys are like CTRL, Shift, Option/Alt, Fn keys where using a combination of modifier key(s) and other (e.g. alphanumeric) keys can be interpreted as different keys. LOWER and RAISE keys do take up 2 spots out of 58 keys, but they introduce 3 new layers on top of the base layer: lower, raise, and adjust layers. In four layers, each physical key from the remaining 56 keys can represent 4 different keycodes (software/digital keys), giving over 200 keycode options.
An example of mapping in Lulu’s layer-based system:
| Input | Output | Layer |
| Q | Q | Base |
| LOWER + Q | F1 | Lower |
| RAISE + Q | “lower screen brightness” | Raise |
| LOWER + RAISE + Q | question mark | Adjust |
When I first installed the firmware to the keyboard (part 2 post), I didn’t make any changes to the keymap file. This time, I went back to the keymap file (which had a .c extension but was basically a text file) and took a look. It had drawings of my keyboard using dashes and slashes, had keys assigned in each spots in drawings, and had another sets of key assignments that actually seem to make a change. I moved the keys around, re-compiled and installed it again. The new arrangement felt more natural than before, but something still didn’t feel right. I went through rounds of trials and errors until they mostly made sense.
For the base layer setup, I ended up removing the Shift key on the right side and swapped CTRL and Shift on the left side. Hitting Enter with my right thumb felt weird, but it still seemed the best place for it.
The screenshot of my incomplete keymap.c file
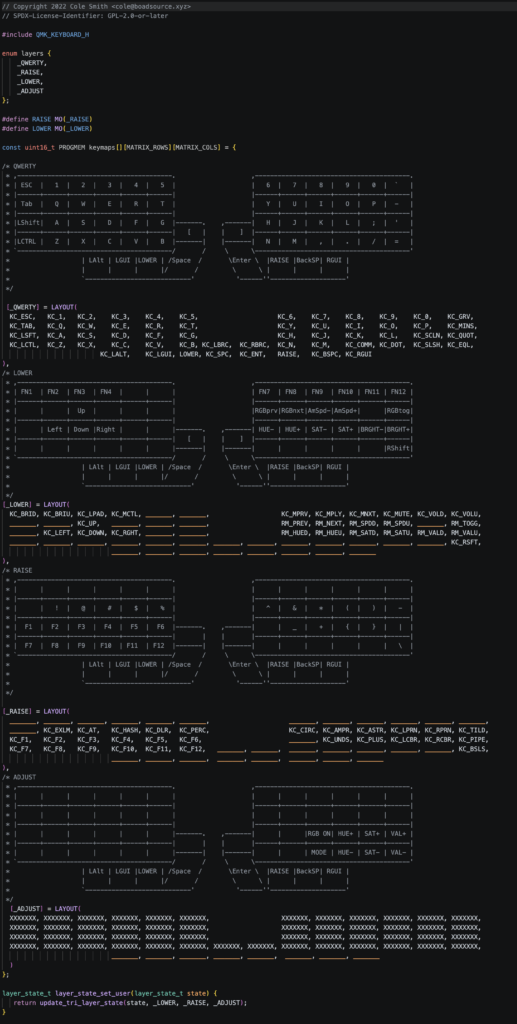
I don’t have arrow keys but it is common to use WASD as alternative arrow keys in games and such, so LOWER + WASD was an easy choice for arrows.
Function (Fn) keys are trickier because each function key comes with a pair of functionalities. Each key has a typical function key assignment like F5, but it also has a special feature like changing the screen brightness or changing the audio volume.
However, there wasn’t a designated Fn key that can switch between function keys and special feature keys temporarily, so I had to add a dozen function keys and a dozen special feature keys separately.
After some consideration, I decided to put both sets of keys at random places; I don’t use them often and I wouldn’t really remember where I put them, especially without keycaps showing where they are.
The Lulu keyboard has additional keycodes for its lights. I have a RGB Matrix lighting, which has per-key lighting options; other common options are backlighting (single or limited colors with limited customization) and RGB Lighting (LED strips with per-strip lighting options).
Keycode options include turning the lights on and off, changing HSV (Hue, Saturation, and Value aka brightness), changing animation speed, and changing modes (a list of preset modes). Preset modes have varying motion behaviors like solid, pulsing, or animation, and varying color patterns like single hue, multi-hues, or rainbows. I choose a solid rainbow colors, celebrating my queerness in style.
Its layout is one thing I can’t change but is something I’ll just have to get used to.
A typical keyboard has a staggered layout where the keys are purposefully misaligned from a row to a row, following the layout of old typewriters.
On the other hand, mine has an ortholinear layout where the keys are both vertically and horizontally aligned like in a grid pattern. An ortholinear layout is more ergonomic than a staggered layout if the keyboard is split. A keyboard can be even more ergonomic if it has a columnar stagger layout, where the keys are vertically aligned but some columns are offset vertically to match the lengths of fingers. I didn’t know a columnar stagger layout was superior, but an ortholinear layout is visually more appealing.
Now the main problem is that I don’t remember many of the keys I set in new layers, since I don’t get visual feedback on the keyboard keycaps. I’ll have to start using them and remember them. Maybe putting small stickers on the keycaps is an option, but I don’t use those often enough and I can always refer back to my keymap file if needed.
At least, let me get used to the new ortholinear layout